
Hero Rotator Instructions
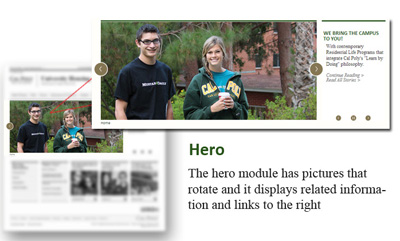
How to Set Up the Rotating Image on a Drupal home page.
1. Preparation:
- Set up your photo(s) so that they’re 730 x 330 pixels. Resolution should be 72 dpi.
- Prepare the text (teaser) that will appear next to the photo, and the accompanying article.

2. Create a Hero Item:
- Log into your Drupal account. Click Add Content and select Hero.
- Enter required Title.
- Date Display is optional.
- Browse for and upload a photo. Each photo will be a separate Hero item. After clicking the upload button, you’ll be prompted to enter Alternate Text. While Alt Text isn’t required by Drupal, it is required for accessibility purposes.
- Enter your teaser text. This displays next to your photo.
- Enter the URL of your Continue Reading link (the page you created in step 1 that accompanies each photo). Or, this could be an external, fully qualified URL. If linking to a page on your Drupal site, use the format /page-name
- To control the order in which items appear, enter a number between 0-5 in the Appearance Order field. 0 is the first item to appear and 5 is the last. (Note that this is only available in Drupal 7). If left blank, the oldest items will appear first.
- Under Publishing Options, check Publish, and Save.
3. After clicking Save, you’ll see your newly created content. Click on your Site Name at the top to view it. If for some reason you don’t see your image, go to Structure → Blocks → and ensure that the block called “hero_slider: Block” is in the Hero Container region.
4. Repeat until all your rotating images have been created. There is no minimum or maximum number of Hero items.
5. To manage your Hero items after you’ve built them, click Content, and sort by type where “type” is Hero. Click Filter to just display Hero items and Reset to get back to the original view.
6. The photos you uploaded are stored in the root directory of your File Browser. Go to File Browser, and select the uppermost folder that has your site’s name in it, or is labled "root". This is your root directory. This is helpful to know down the road when you’re cleaning up old files.
7. To configure the Read All Stories link, first create a page that has all your rotating images and copy (story) on it. As you add images to your home page later, don’t forget to update this page. This page is required for the Hero Rotator to be accessible. To configure this link, go to Configuration → Hero Slider Read All Stories Link. Use the format /page-name.


